It is always a good things to write units tests against our code. Once we have some unit tests written, the next question is do our tests have enough code coverage. This post shows you how to setup up your CI to run unit tests and report them using cloud based tools. More specifically, we use TravisCI to perform builds and we show the test coverage on Coveralls.io.
Source App
Let say we have a Node app containing a file src/age.js with the following code:
1
2
3
4
5
6
7
8
9
10
11
12
13
'use strict';

module.exports = {
  older: function (a, b) {
    if (a.age > b.age) {
      return a.name + ' is older than ' + b.name;
    } else if (b.age > a.age) {
      return b.name + ' is older than ' + a.name;
    } else {
      return a.name + ' and ' + b.name + ' have the same age';
    }
  }
}
Unit Tests
Now, we add unit tests for the code above. We put the tests in ‘test/age.js’ as:
1
2
3
4
5
6
7
8
9
10
11
12
13
14
var should = require('should'),
  age = require('../src/age.js');

describe('My test suite', function () {
  var ben = { name: 'Ben', age: 31 },
    frank = { name: 'Frank', age: 27 },
    john = { name: 'John', age: 27 };

  it('should assess who is older', function () {
    age.older(ben, frank).should.be.equal('Ben is older than Frank');
    age.older(frank, ben).should.be.equal('Ben is older than Frank');
    age.older(john, frank).should.be.equal('John and Frank have the same age');
  })
});
To use Mocha to run our tests, we add it to our app:
$ npm install --save-dev mocha
Then we create a new npm command to run our tests by adding this to our package.json
1
2
3
"scripts": {
  "test": "NODE_ENV=test mocha"
}
And we execute all files under the test directory. We should see something like this:
1
2
3
4
5
6
7
8
9
10
11
12
$ npm test

> node_test_sample@1.0.0 test /node_test_sample
> NODE_ENV=test mocha


  My test suite
    ✓ should assess who is older


  1 passing (47ms)
Automated Builds with TravisCI
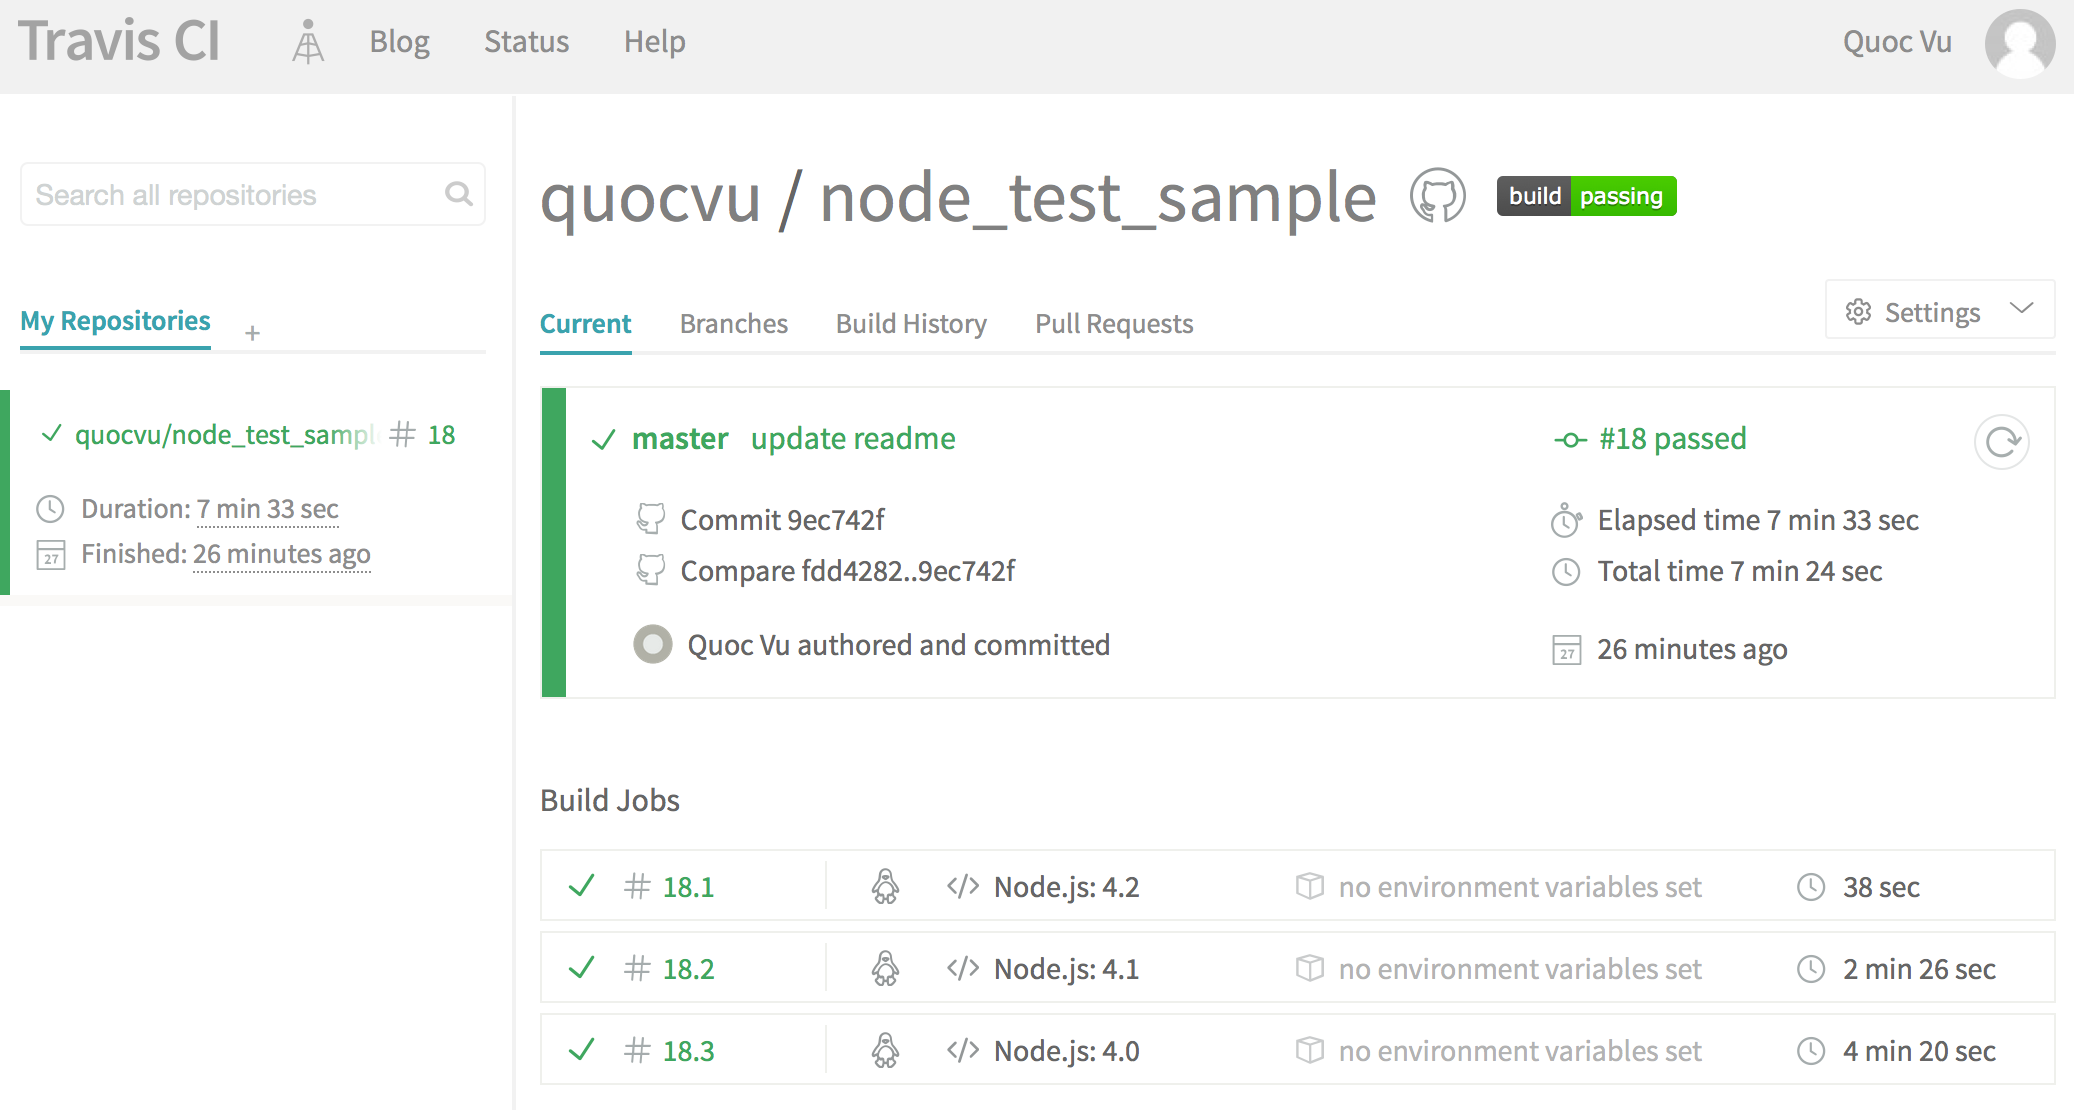
We use TravisCI to perform automated builds upon check ins. It runs our unit tests and let us know if there are problems. Let’s set it up.
- Sign up for account with TravisCI by using our GitHub ID. That links the 2 accounts together.
- Go to our TravisCI account and we should see a list of GitHub repos. If that list is empty, comeback in 10 minutes to allow it to sync up.
- Add a
.travis.ymlfile at the root of the Node project (wherepackage.jsonis located) with the following:
1
2
3
4
5
language: node_js
node_js:
  - "4.2"
  - "4.1"
  - "4.0"
- Push this change to GitHub and TravisCI will fire a new build. By default it runs
npm test. - Go to our TravisCI dashboard to see the status of the new build.
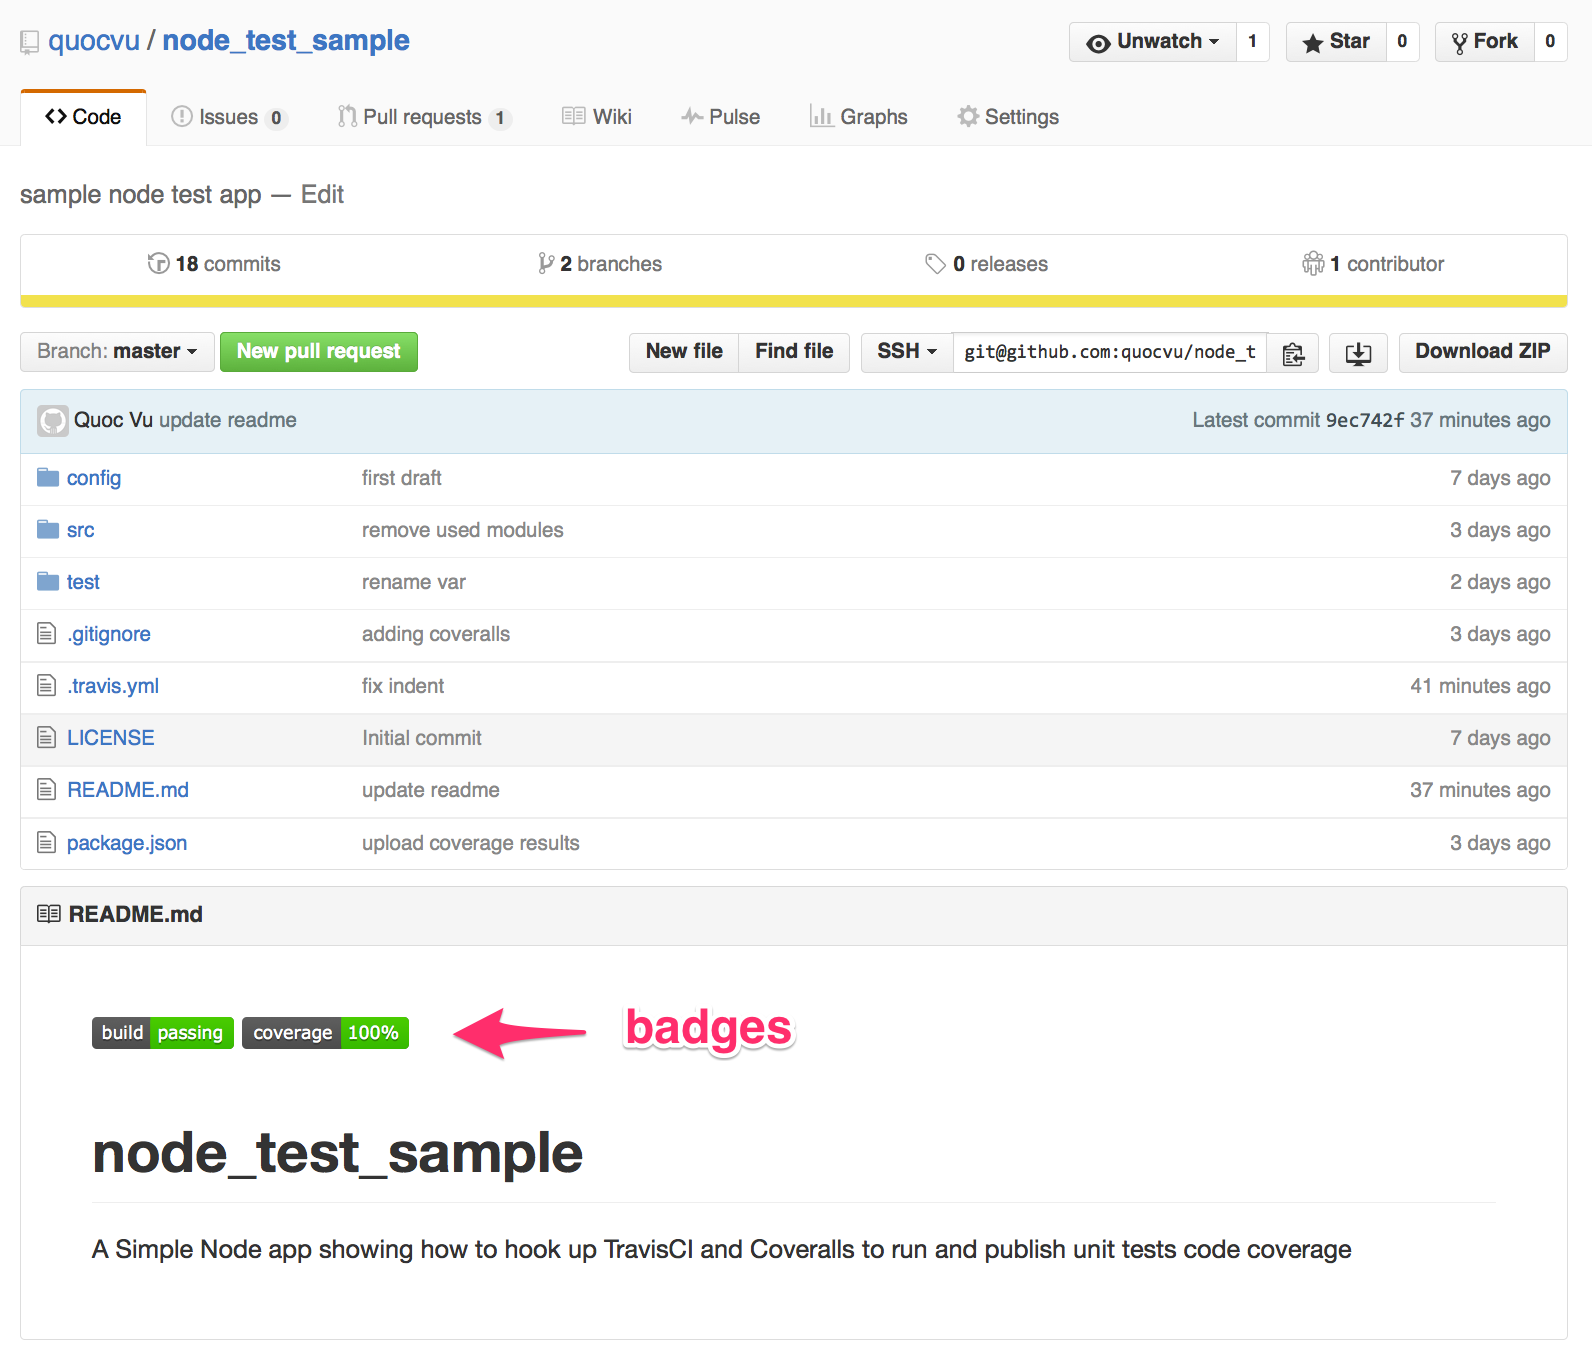
- Click on the badge, select
Markdown, copy the little snippet, and paste it at the top of theREADME.mdfile. The status of the build is now shown directly on our GitHub repo main page.
![]()
At this point, our Node app is getting built automatically upon each check in and we get to know if our tests passed or failed from our Github repo page or TravisCI dashboard.
Code Coverage
It’s cool to know our tests passed, but it won’t be any good if they cover only 1% of our code. Thus we also need to know how much our tests cover.
Calculate Code Coverage
We use Istanbul to calculate code coverage. We add it to our project
$npm install --save-dev istanbul
We create a npm command to run it by putting this in package.json
1
2
3
4
"scripts": {
  "test": "NODE_ENV=test mocha",
  "cover": "NODE_ENV=test istanbul cover _mocha"
}
Note we use _mocha (underscore mocha) so that it doesn’t run in a child process. Now our test run looks like this:
1
2
3
4
5
6
7
8
9
10
11
12
13
14
15
16
17
18
19
20
21
22
23
24
$ npm run cover

> node_test_sample@1.0.0 cover /node_test_sample
> NODE_ENV=test istanbul cover _mocha


  My test suite
    ✓ should assess who is older


  1 passing (20ms)

=============================================================================
Writing coverage object [/node_test_sample/coverage/coverage.json]
Writing coverage reports at [/node_test_sample/coverage]
=============================================================================

=============================== Coverage summary ===============================
Statements   : 100% ( 6/6 )
Branches     : 100% ( 4/4 )
Functions    : 100% ( 1/1 )
Lines        : 100% ( 6/6 )
================================================================================
As you can see, the code coverage results are being stored in the ./coverage directory. Add this directory to
.gitignore to avoid having them in our repo.
Publishing Code Coverage
We want publish our code coverage results (in the ./coverage directory) to Coveralls. Not only it displays a nice code coverage reports, it can also send notifications when the coverage drops below a certain point or when it drops significantly.
Let’s set it up.
- Sign up for an account at Coveralls using your GitHub account. The 2 accounts will be linked.
- Click on the
Repomenu on the left navigation - Click on
Add Repobutton on the top right corner to add this GitHub repo -
Add these 2 modules to our project to upload coverage results to Coveralls
$ npm install –save-dev coveralls mocha-lcov-reporter
- Create a npm command to run the upload. Put this in
package.json
1
2
3
4
5
"scripts": {
  "test": "NODE_ENV=test mocha",
  "cover": "NODE_ENV=test istanbul cover _mocha",
  "coveralls": "npm run cover -- --report lcovonly && cat ./coverage/lcov.info | coveralls"
}
- Make TravisCI run our code coverage by adding this to
.travis.yml
1
2
after_success:
  - npm run coveralls
- Push this change to GitHub, it will fire a Travis build, which now will run code coverage, and upload to Coveralls.
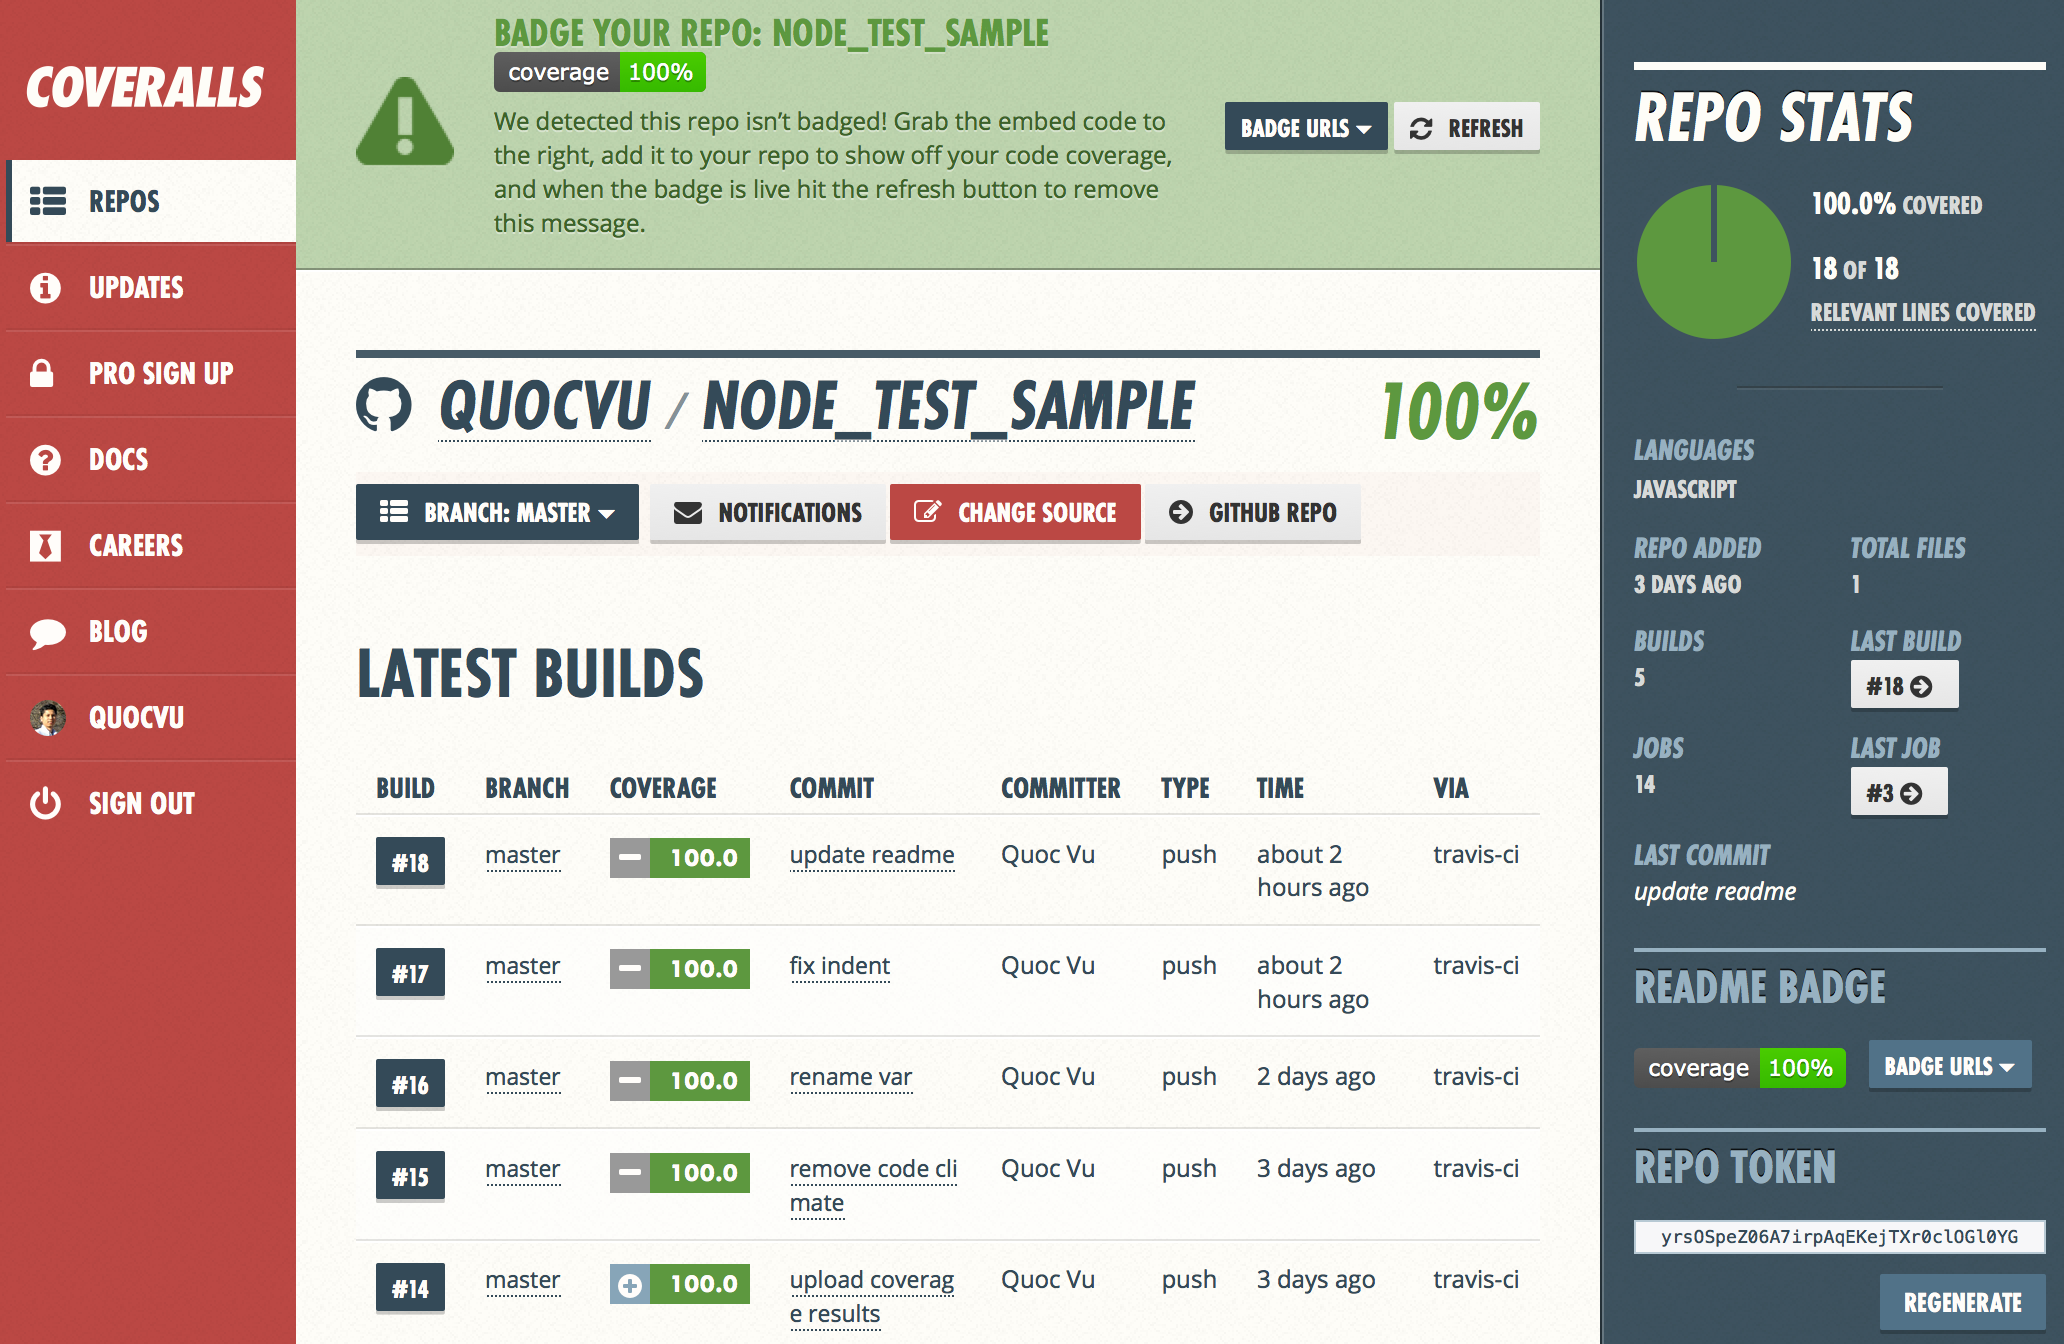
- Go to Coveralls, that’s our dashboard
- Click on this repo, then click on the
Badge Urlsbutton on the top right corner, copy the snippet forMarkdown, and paste it at the top of ourREADME.mdfile. Now we can see the coverage percentage directly from GitHub.
![]()
Voila!
That’s all folks. Let’s look at our awesome repo. You can find it at https://github.com/quocvu/node_test_sample. Click on the 2 badges to see more details in TravisCI and Coveralls.